
Online data collection plays a crucial role in the success of any digital marketing strategy.
Tools like Google Analytics, Adobe Analytics, and other web analytics softwares are vital for marketers but, while extremely powerful alone, their true potential is only leveraged when combined with a good understanding of how marketing tags work.
Tags are tiny bits of code that you can add to your website and perform a variety of functions.
For marketers, these tags are usually responsible for collecting information regarding user behavior on their websites and sending them to third-parties, such as Google and Facebook.
Understanding how to implement these tags on your website will allow you to track most actions users are taking on your website, and take your analytics capabilities to the next level.
- How many people are visiting our website?
- How many people are filling out our forms?
- How many people are watching our videos after clicking the ‘Play’ button?
- For how long are they watching?
With Google Tag Manager it is possible to answer all these questions, and much, much more.
What Is Google Tag Manager?
Google Tag Manager is a free tag management system solution provided by Google that allows marketers to implement tags without requiring the assistance of a web developer.
With Google Tag Manager you can install and manage multiple marketing and analytics tags on your website, app, or AMP.
In other words, it’s a neat tool that makes it easy to install tags such as the Google Analytics Tag, the Facebook Pixel, and any other tag you can think of.
Why You Should Care
Before tag management systems, marketers had to rely on web developers to manually implement these tags whenever needed.
This would often lead to a whole lot of issues.
- Large dependency on web developers.
- Not being able to properly test tags before pushing them live.
- Hard to keep track of which tags had been added, why, when, and by whom.
- Lower page speeds due to multiple tags loading slowly.
- And other reasons.
In other words, if you need to add different marketing and analytics tags to your website, Google Tag Manager can save you a lot of time.
How It Works
According to Google, it works…
“(…) via its own code snippet that you add to your own website or app. Once this code is implemented, you will then be able to use the Tag Manager interface to set up tags, establish triggers that cause your tags to fire on specific events, or create variables that can simplify and automate your tag configurations.”
In other words, when a browser reads your website’s code, it will read the container code that you added to install Google Tag Manager – we have covered the installation process in the previous post.
Once the browsers read that code, all the tags stored within that container will be deployed, and execute their respective functions.
The Building Blocks: Tags, Triggers & Variables
Google Tag Manager is built on three main components: tags, triggers, and variables.
To use Google Tag Manager well, you’ll need to understand what each of these components does, and how they work.
Let’s take a look at these components so we can understand what each one means.
- Tags: snippets of code added to a page used to collect data for platforms such as Google Analytics, Facebook Ads, and more.
- Triggers: used to “listen” to user interactions and define when a tag should be executed. A button click, a page view, and other triggers.
- Variables: little bits of information about the website that are used to define when a trigger should fire, or pass information within a tag.
Before we cover the process of how to implement the actual tags, let’s take a look at what this would look like with an example.
Before We Get Started
Let’s assume you want to install the Facebook Pixel event code and track users who complete a sign-up form on your website.
- You add the Facebook Pixel event code (tag) to Google Tag Manager.
- You create a trigger that “tells” the tag to fire whenever a user completes the form – when a user reaches a thank-you page, for example.
- You use a variable to tell Google Tag Manager that the thank-you page URL contains “/signup-successful” – it’s a computer, it needs to understand what a sign-up means.
When a browser loads a page that contains that same URL, Google Tag Manager will fire the Facebook Pixel code.
Let’s see how we can do that, step by step.
You can read our post on how to install the Facebook Pixel for more information.
How To Use Google Tag Manager
Now that you understand the basics of Google Tag Manager, let’s take a look at how you can use this incredible tool to install tags of your own.
For demonstration purposes, we’ll install the Facebook Pixel event code described above – but you can use the exact same process to install almost every tag you can think of.
Let’s get to it.
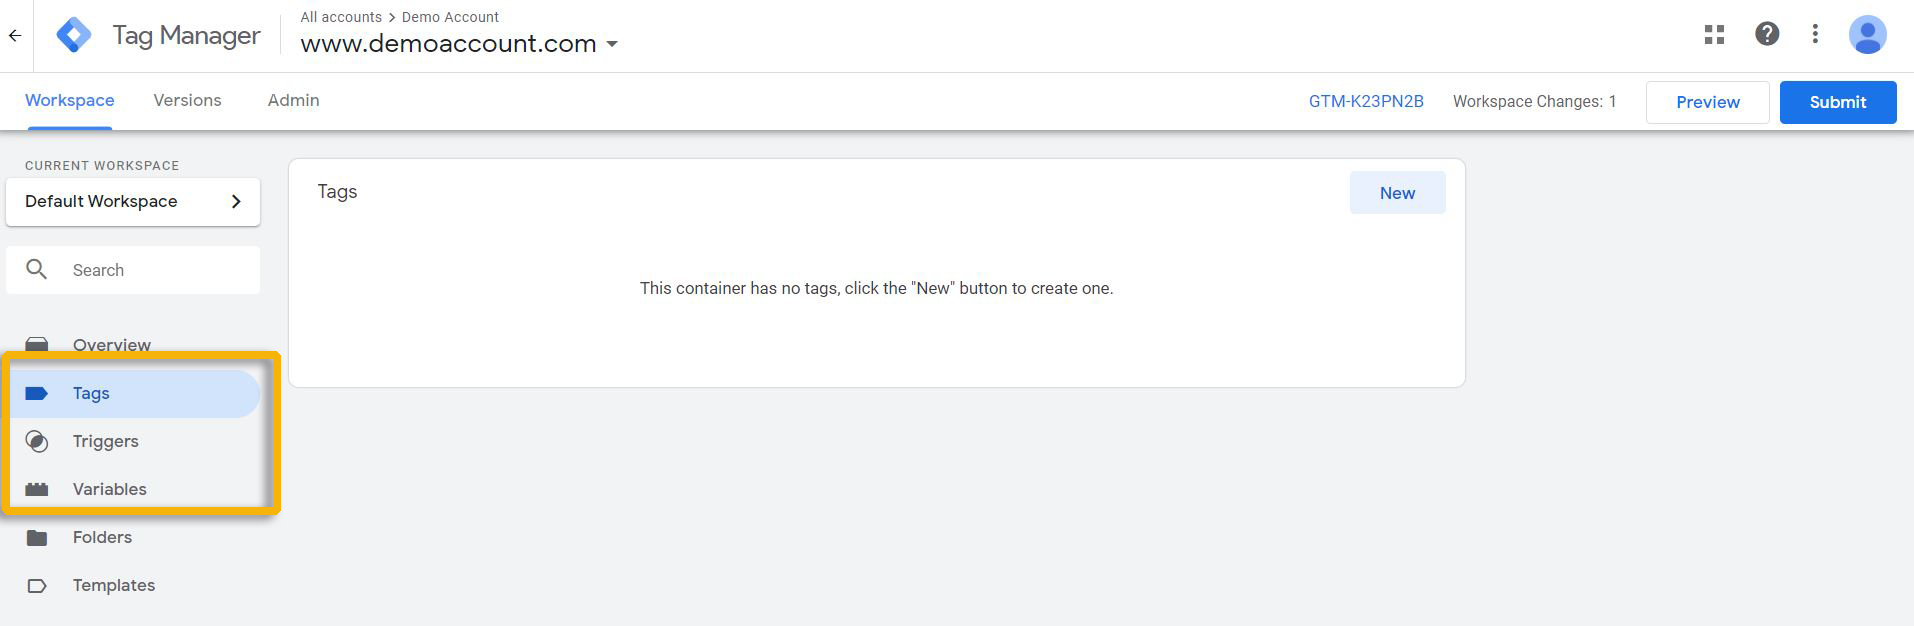
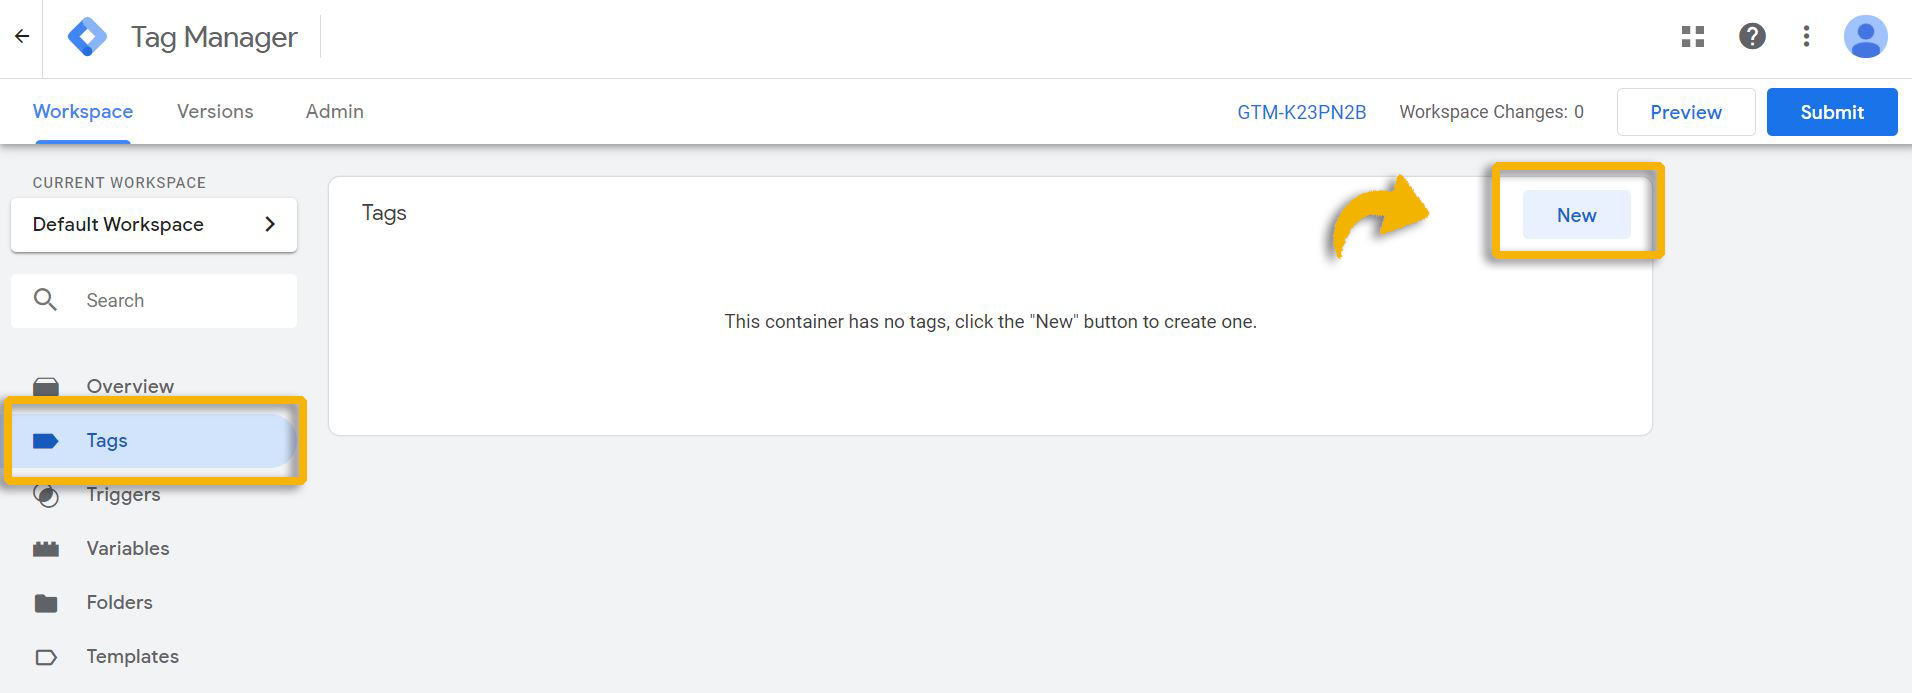
1. Create & Add Your Tags
To create a new tag, navigate to the “Tags” menu in the left sidebar, and hit the “New” button on the top-right of the dashboard.
The next screen is where you’ll be able to add your tags, and select the triggers to fire those tags.
To do that, choose an adequate name for the tag you’re about to install, and then click on the tag configuration menu below.
A panel should open to the right of your screen, such as the one in the image below, to choose the tag type you want to install.
In this case, we’re adding the Facebook Pixel tag – so we’ll need to select the “Custom HTML” option. Google Tag Manager doesn’t have a default template for Facebook, so we’ll need to add it via custom HTML.

Once you’ve clicked on the custom HTML button, you’ll need to paste in the Facebook Pixel custom code in the HTML section.
2. Create Your Trigger(s)
As mentioned earlier, tags only fire when an action occurs – in this case, when a user visits a URL that contains “/submit-form”.
To create this trigger, scroll down to the bottom of the screen and click on the “triggering” section below.

In this screen, you can see the triggers you have already created, or are there by default.
For example, if you wanted to fire a tag whenever a user visited any page on your website, you would simply select the “All Pages” trigger. In this case, since we want to fire the tag only on a specific URL, we’ll have to create a new tag for that.
To do so, click on the “+” icon, on the top-right of the screen to create a new condition for your tag to fire.

Choose a name for the trigger, and click on the trigger configuration section below, and then on the “page view” button to the right.

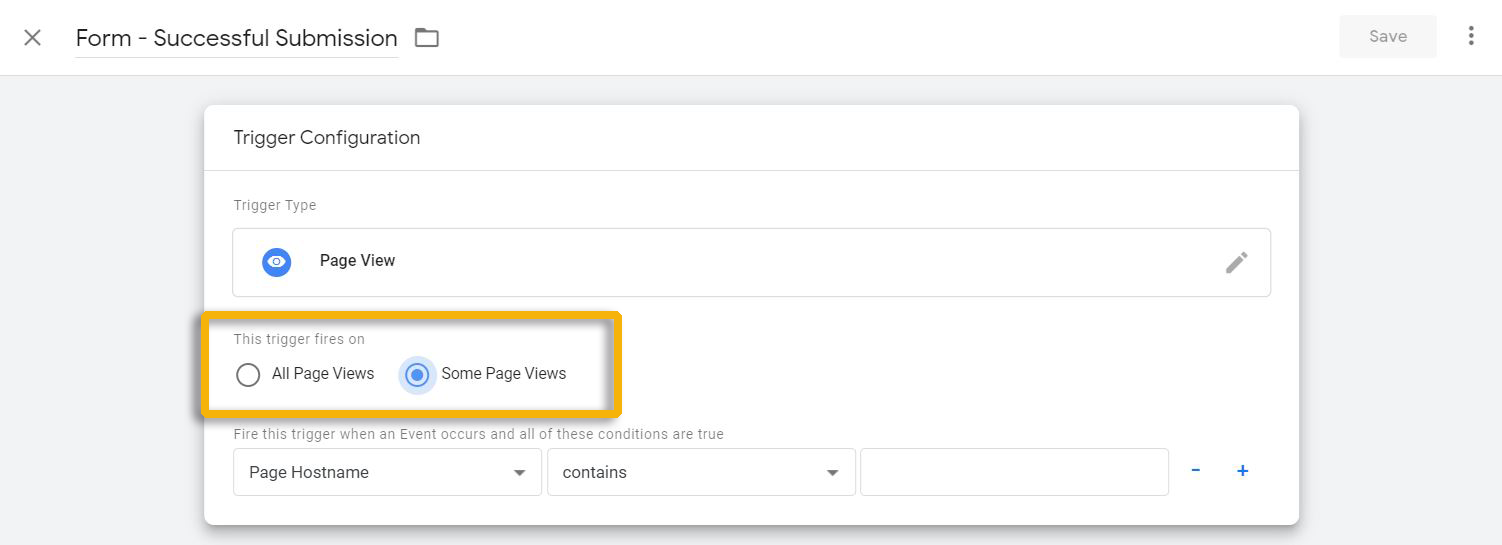
In the next section you’ll be able to select whether the trigger fires on all page views, or on some page views.
Since we want to trigger our tag when users reach the thank-you page only, we’ll select the latter.
3. Use Variables In The Trigger
Google Tag Manager has a lot of pre-defined variables that can be used in tags, and triggers.
In this case, we’ll use the variable “Page URL” to select the conditions under which our Facebook Tag should fire
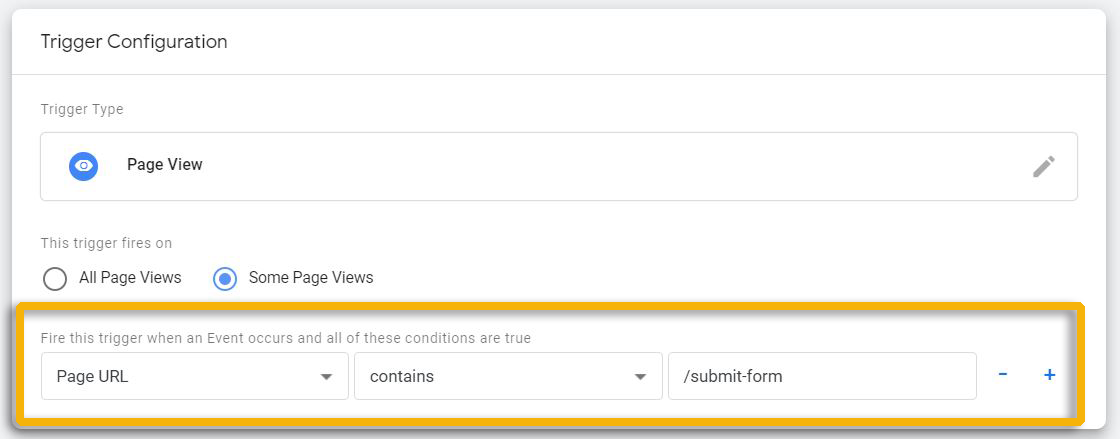
Variables are named placeholders for different values, such as a page url, product price, or product quantity. In this case, our variable “Page URL” needs to have a “/submit-form” value for the trigger to execute.
Variables can also be used in tags to pass along dynamic values, such as product prices, product quantities, etc. They are very useful for eCommerce configurations, such as Google Analytics’ enhanced ecommerce.
Once you’re done, hit the “Save” button and you’re (almost) done!
There’s just one last thing.
The Preview Mode
Before you can publish your tag, we recommend you make sure everything was correctly installed.
To do that, you can resort to Google Tag Manager’s preview mode. You can access this feature in the “Preview” button, near the top.
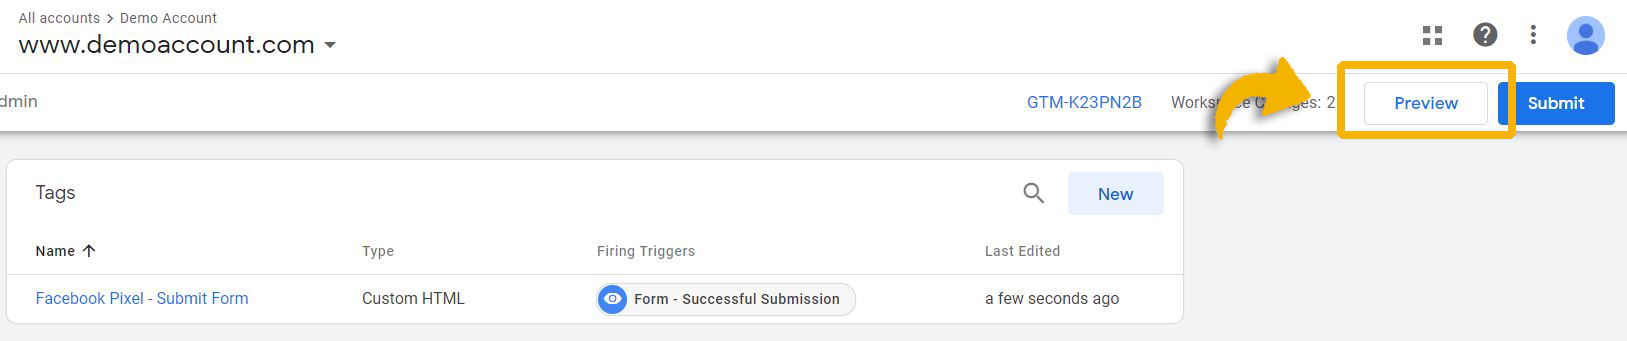
With the preview mode, you’re able to test the tags you just added to your website before publishing the workspace.
Once you click the button, open your website in a new tab (or refresh the page). You should now see a panel in the bottom of your screen.
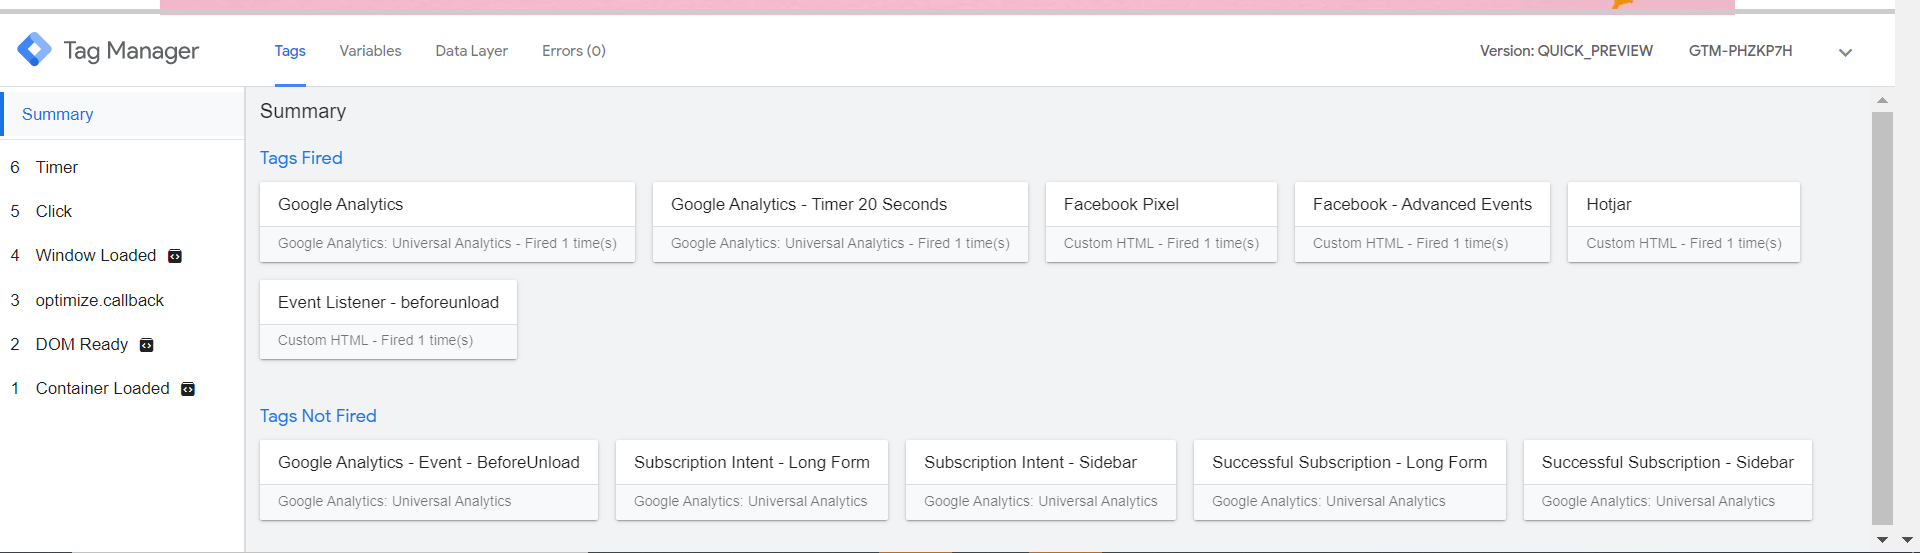
As you navigate your website, you should the which tags fired under the “Tags Fired” section, and the tags that are installed in your container, but didn’t fire.
Tags are only supposed to fire when a certain condition (a trigger) is verified, so it’s fine if you see tags that didn’t fire.
In our post about variables, we’ll go further into detail on how you can use this tool better. For now, just make sure your tags fire when you access your “/submit-form” page – or whatever your page is.
Publish Your Tags
Finally, just hit the “Submit” button right next to the “Preview” button, and then hit “Publish”.
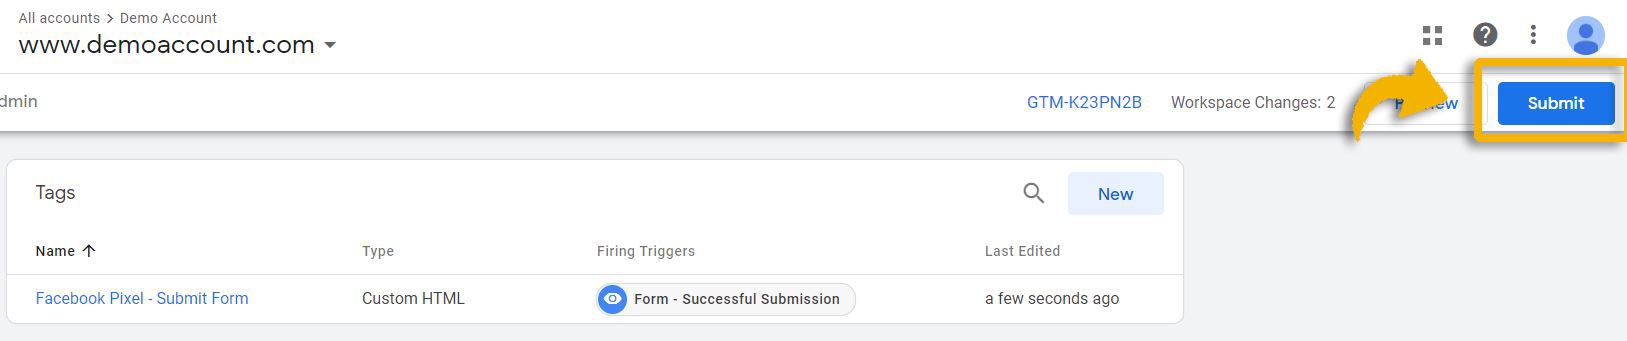
You’re done!
What’s Next?
As you start to understand how Google Tag Manager works, you will want to deeper into variables, and the data layer.
With these two components you’ll be able to track conversion values for purchases or leads, create advanced events for Google Analytics or the Facebook Pixel, and much more.
The level of detail you can get into your reports with Google Tag Manager is truly one of the most powerful elements you can bring into your business.
Our post next week will cover some of the more advanced features of Google Tag Manager variables and the data layer.
You can read it in the link above.
Did you have any trouble installing your tags with Google Tag Manager?
Let us know in the comments or shoot us an email and let’s talk!

